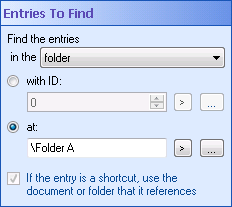
The ![]() Entries To Find property box determines where the Find Entries activity looks for entries.
Entries To Find property box determines where the Find Entries activity looks for entries.
Note: If you want to return only an individual document, rather than the parent folder, use the Find Entry activity instead.
To configure Entries To Find
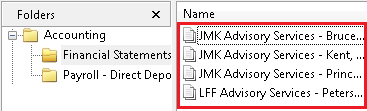
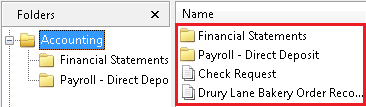
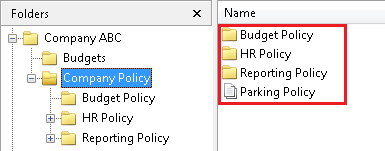
Example: The Financial Statements folder, inside the Accounting folder, contains several statements. If you select to find the entries in the folder Financial Statements (specified by either its ID or path), then all of the statements inside that folder will be returned. ![]() Show me what that looks like. If you select to find the entries in the same folder as the entry Financial Statements (specified by either its ID or path), then all the entries inside the Accounting folder will be returned.
Show me what that looks like. If you select to find the entries in the same folder as the entry Financial Statements (specified by either its ID or path), then all the entries inside the Accounting folder will be returned. ![]() Show me what this looks like.
Show me what this looks like.
To find entries based on their ID number
All documents, folders, and shortcuts stored in a Laserfiche repository are assigned a Laserfiche Entry ID number. If you choose to find entries based on an ID number, the entry with the specified ID does not need to stay at the same path for the Find Entries activity to find it.
- Select with ID.
- Type an entry ID, or click the Browse button (ellipsis)
to open the Browse Laserfiche Entries dialog box. Alternatively, click the Token button (right arrow)
to use tokens.
Note: If the ID refers to a document or shortcut (instead of a folder), the activity will return all the entries in same folder as the document or shortcut.
To find entries based on their location in a repository
If you choose this option, the entry you specify a location for must stay at the same path for the activity to run correctly.
- Select at.
- Type a location path, or click the Browse button (ellipsis)
Note: If you browse to or specify a path to a document or shortcut (instead of a folder), the activity will return all the entries in same folder as the document or shortcut.
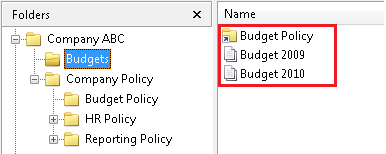
- Select If the entry is a shortcut, use the document or folder that it references to retrieve entries in the folder where the actual entry is located. If you don't select this option, the activity will return the documents in the folder where the shortcut is.
Give me an example.
|
This documentation is specific to version 9.0. You can find the most up-to-date help files for the latest version at Current Online Laserfiche Product Help Files. For further help or feedback, please see the Laserfiche Support Site. |
© 2013 Laserfiche |